 I’ve been asked how I do these pastel paintings.
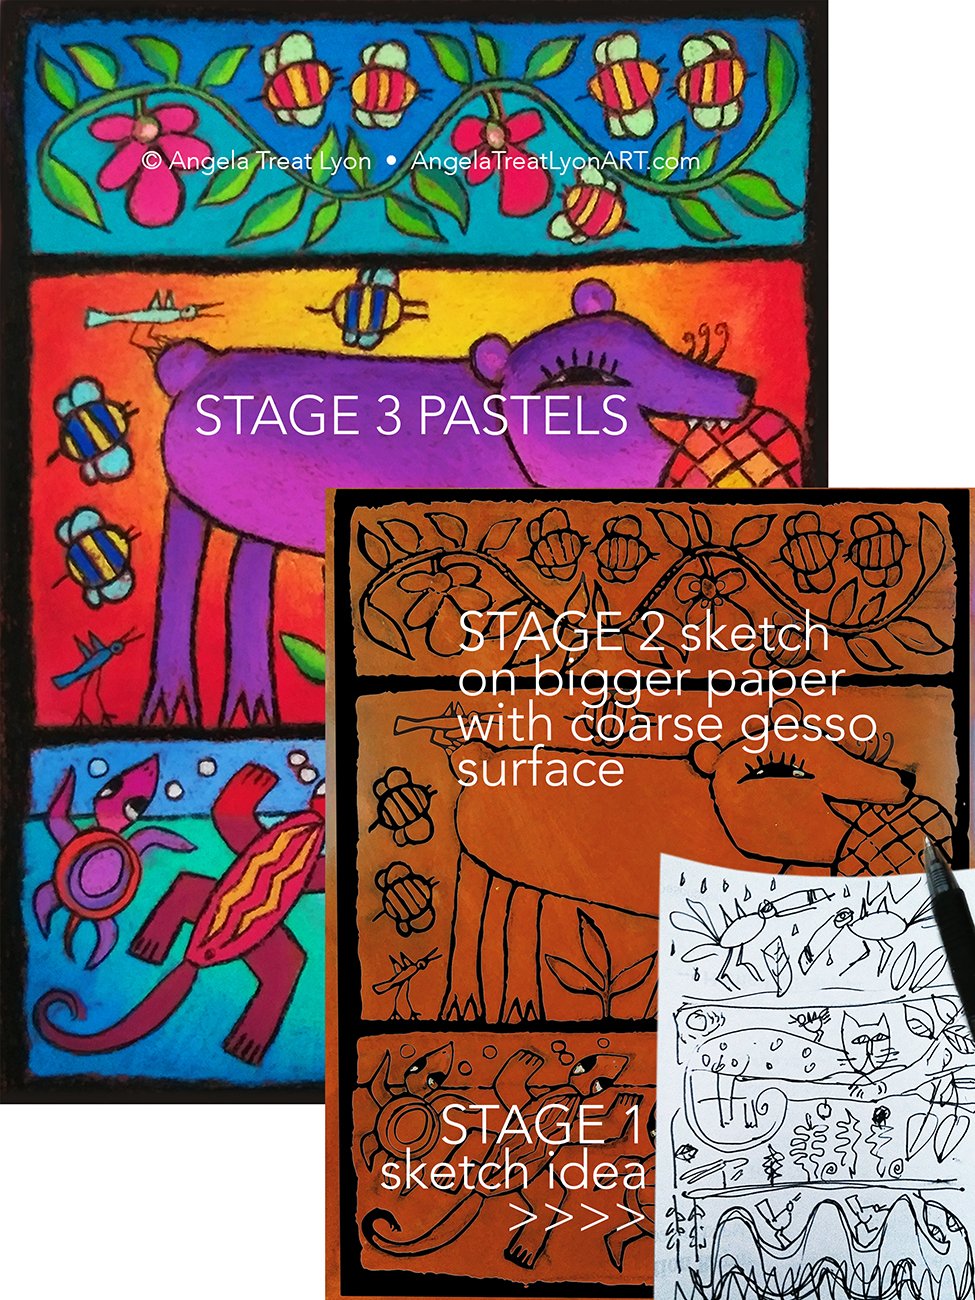
I do them in three main stages.
First comes the idea, sketched roughly in black ink on a little scrap of paper.
Then, I prepare a bigger sheet of paper or art board with a special gesso primer that has marble dust in it, so it’s like about a 200 grit sand paper. I also add a medium rust color to it as undercoat.
I do a soft sketch on that surface. Then, when I’m sure of my lines, I make them darker using a very soft, very black pencil, and spray it with fixitive, so the lines don’t smudge if I touch them as I’m painting with the pastels.
Next come the color pastels. I turn the paper upside down, doing the top third of the design, so the pastel dust falls to the top of the piece. That way it won’t cloud the bottom two thirds.
I put the colors in first, then I do the black outlines with a very soft black charcoal pencil.
Now I turn the paper right side up and do the middle, then the bottom sections the same as I did the top section – pastels first, then the black outlines.
When I first started using the pastels, I didn’t realize how much dust would be involved, until I looked down and saw the floor under my feet saturated with it! It took some major vacuuming to get it out of the carpet. (Not my house – can’t remove it, or I would!)
I use a small air filter machine right on my table, because the volume of dust doing these things is phenomenal – as much as I can, I avoid breathing it or allowing it to cloud the air. Seems like there is always some kind of trade-off for the creation of beauty!
So there ya have it!
(The little sketch is for another pastel, Leonard Leopard – I don’t do them for every piece – sometimes I just draw right on the gessoed paper. Honey Bear was one of that kind.)
No Comments Yet